DIY wall stencil…
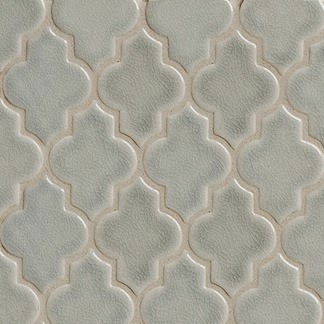
I shared with you last week my latest design crush, the Ashbury Mosaic tile, which is part of the Vibe collection by Walker Zanger. So what did I do with my crush, you ask? I took the pattern, created my own stencil and painted it on one wall in my front entryway.

There are hundreds of other tutorials out there that suggest all different ways to go about this. I read through a lot of advice until I came up with what worked best for me. Some suggest taping a small level onto your stencil to line it up, I felt that I could skip that step. Others suggested a cardboard stencil, I preferred paper. Keep in mind that any large scale project like this requires a couple days so you have to be comfortable with your process.
I did a little bit each day in order to not drive myself nuts. It was a very repetitive process but very much worth it! This project took me a total of 5 days from start to finish. I chose to only do one wall but am seriously considering continuing the pattern throughout the rest of the entryway. After emptying the space of the bookcase and accessories that were there, here’s what I had to work with…
I did a little bit each day in order to not drive myself nuts. It was a very repetitive process but very much worth it! This project took me a total of 5 days from start to finish. I chose to only do one wall but am seriously considering continuing the pattern throughout the rest of the entryway. After emptying the space of the bookcase and accessories that were there, here’s what I had to work with…

I started by printing out an image of the tile and tracing it onto a piece of paper. I would be repeating this image over and over again on the wall. I decided to trace the grout marks and not the tile itself since it made for a better pattern.
I enlarged it a bit until I got the scale I wanted and then trimmed it out on a piece of paper. Many tutorials recommend cutting your pattern out on cardboard. I preferred paper since I felt the edge was crisp and since I could also easily bend it around corners and outlets.

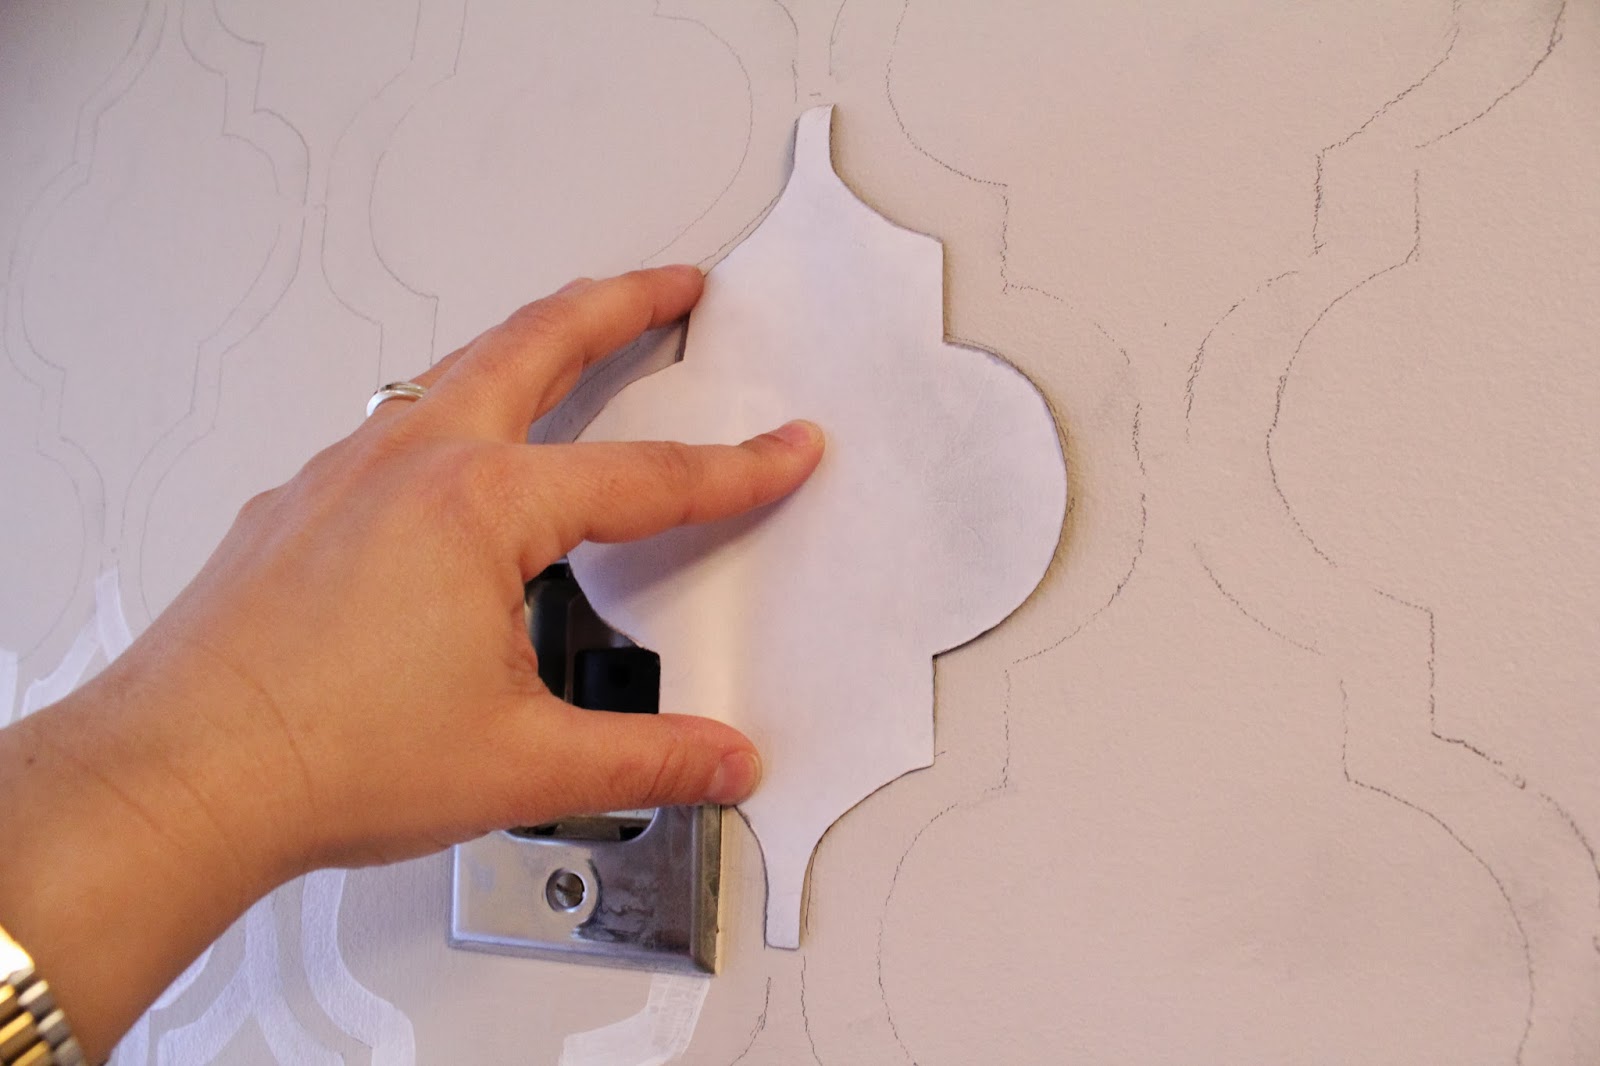
After cutting the pattern out I began drawing it on my wall with a pencil. I started at the far right corner and traced up the entire wall. This way the visible edge lined up perfectly. As I continued on I traced once and then moved the stencil over and up to mimic the grout lines of the tile. After my tracing was complete I painted over it using a high gloss white paint on the inside of each pencil mark. I could have just traced once and lined up the pencil marks on top of each other but I really liked the double effect. I ended up tracing a bit, then painting a bit. I wanted to see some progress to make sure I really liked it!

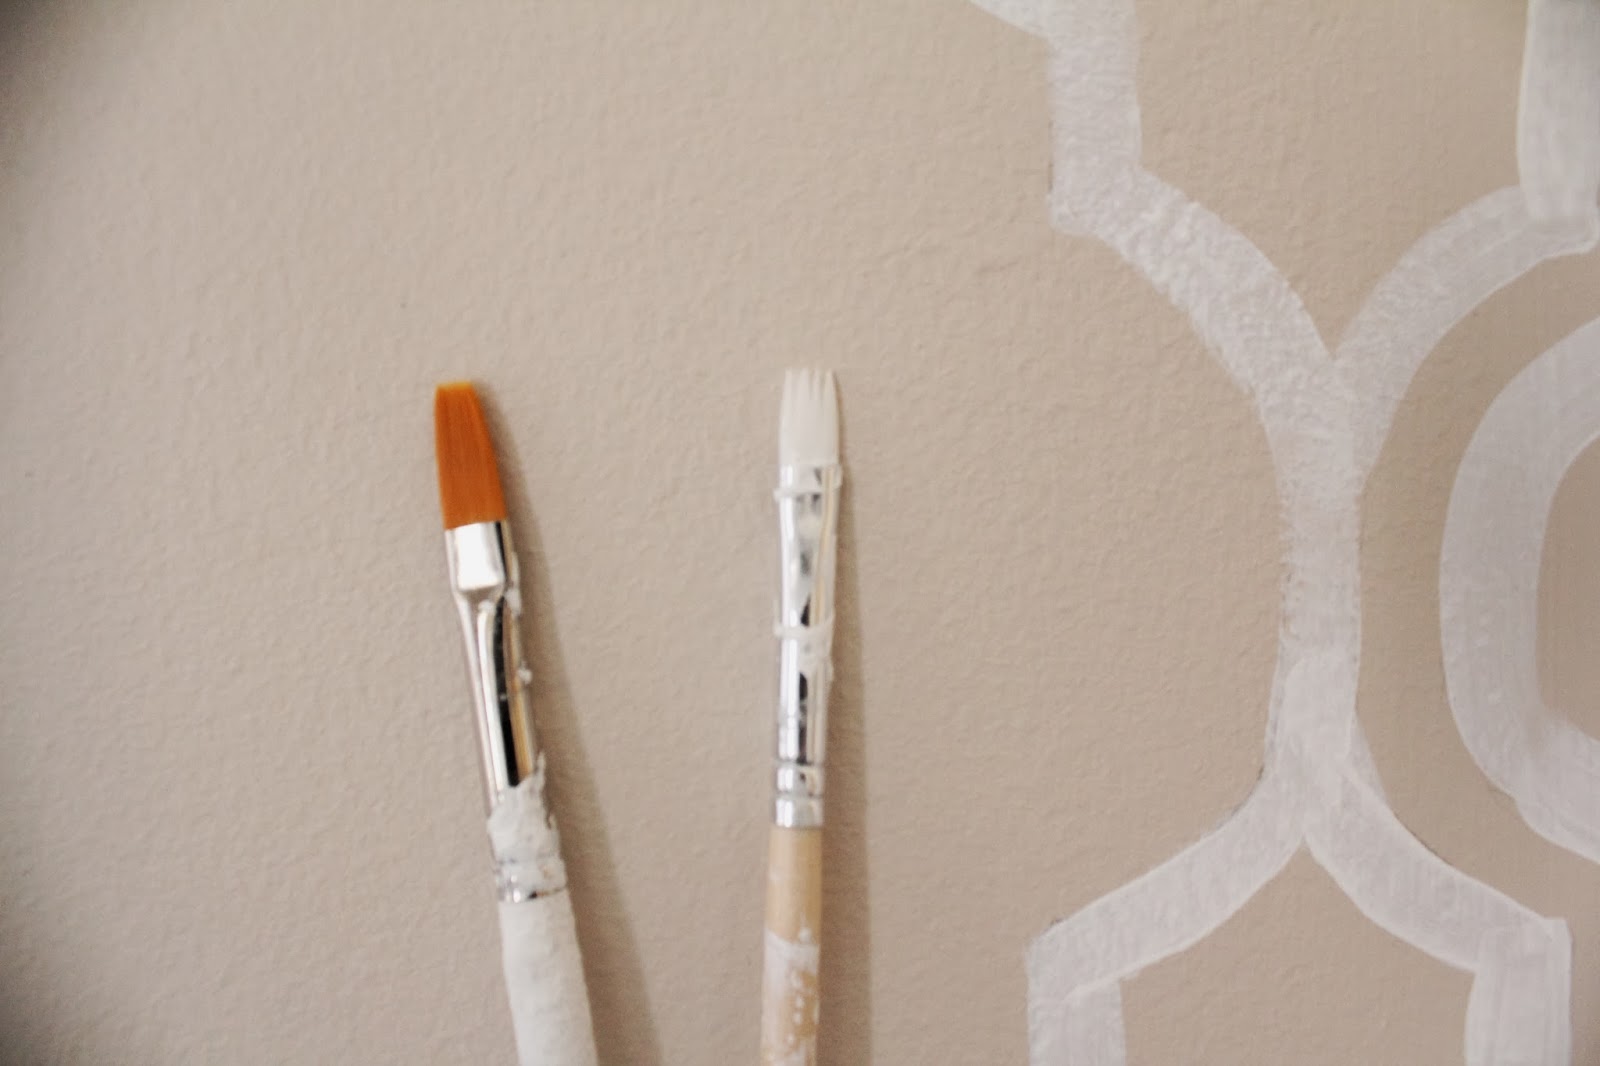
When it was time to paint I chose a paint brush that was the width of the brush stroke I was looking for. I actually found out through some trial and error that a brush with short bristles works better than a brush with longer bristles. I had more control over the shorter bristle brush. The brush on the left is the one I began with. I quickly found out that the brush on the right (shorter bristles) worked much better, especially with the curves. It also made for a cleaner end stroke.
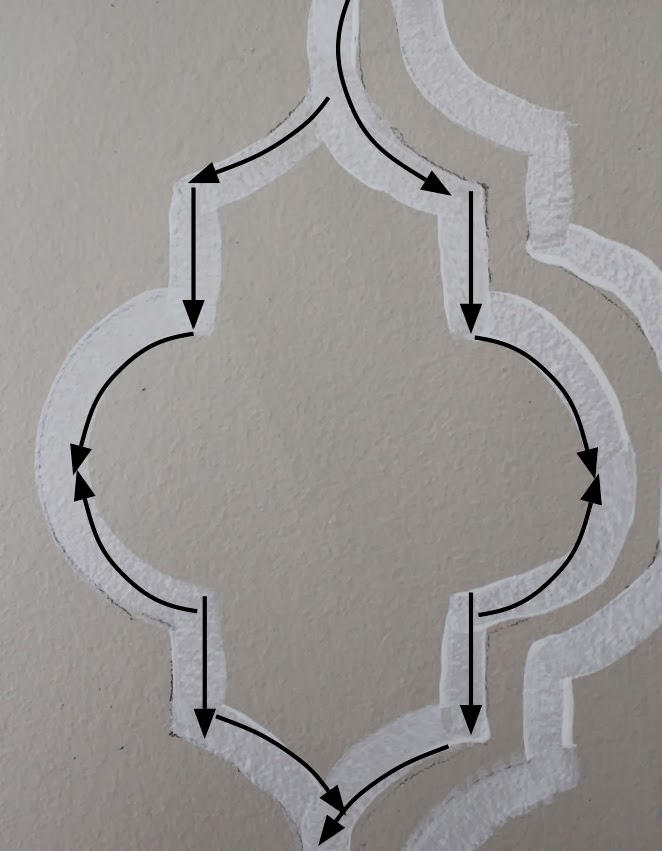
The best way to paint was to follow these guidelines. Paint in the direction of the arrows below. That way each corner has a crisp clean edge because each one is a new stroke created by the end of the brush. Practice a bit on another surface if you are nervous about applying it to the wall. When I made mistakes I just wiped it off quickly and began again. The more I painted the better I got.
I found the painting easier than the pencil marks. Once all the painting was done I erased all pencil marks that were visible. My Mr. Clean Magic Eraser helped as well.

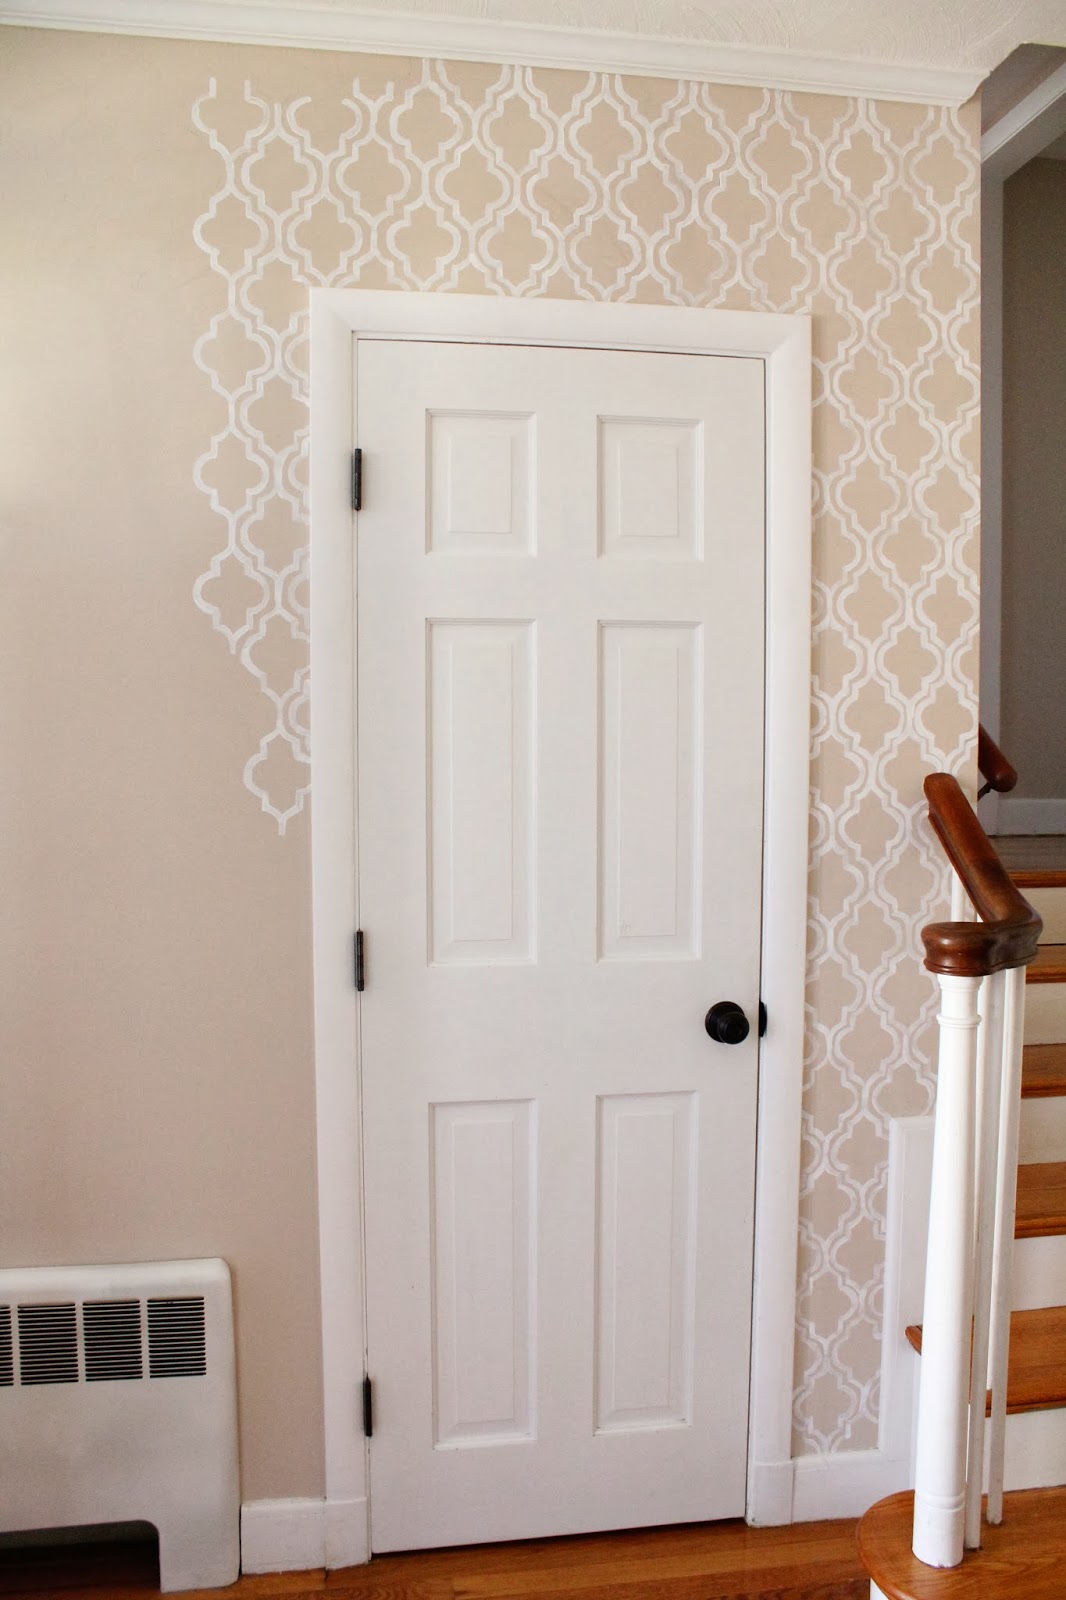
It is definitely not a perfect job. I’m not a perfectionist in the least bit. If you study it up close you’ll see that. I painted a bit the first day and then left it. I knew that if I hated it I could just paint over with the original paint color. As I studied it from across the room I decided I liked it. No, loved it. All the inconsistencies were not visible but the general pattern creates the effect.
I worked a little bit each day until it was done. I’d show you the finished product but being who I am I was working on another project at the same time in the same space. Final reveal coming soon!
Share this:


Subscribe to Posts
Featured On...


 |
Blog Policies
For more information on all blog policies regarding comments, advertising, copyright, sponsored links, guest submissions, and other matters, please look here.