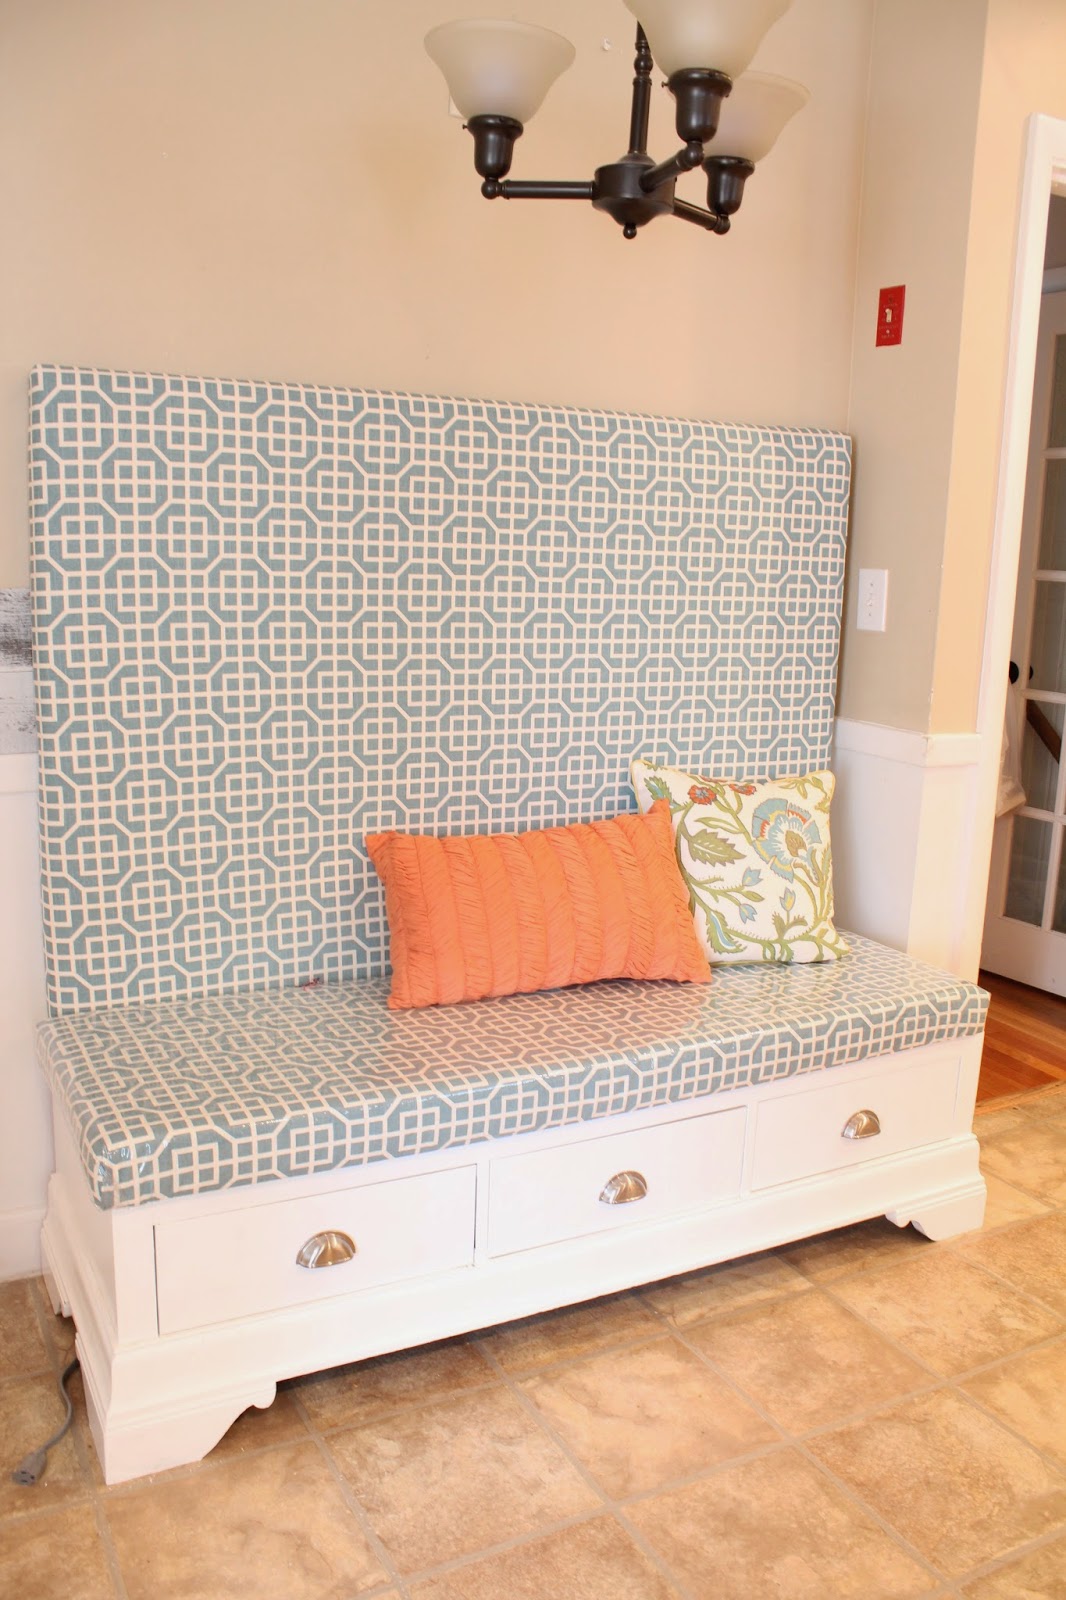
no sew bench cushion
Continuing on with my banquette, the next (and final) step in the entire process was a bench cushion. I ordered myself a three inch piece of foam custom cut just slightly larger than the measurements of my bench. I would be wrapping this tightly with batting and fabric. I wanted the cushion to extend just a bit from the base of the bench.
Since this would be a bench I was using everyday I wanted to get good quality foam. I ordered Lux High Quality foam which is suggested for seats, chairs, cushions, benches and mattresses. The typical life span of this foam is 16 years.
It arrived all rolled up so I let opened it up and straighten out for a day or two. In the meantime I had a piece of MDF cut at Home Depot to the measurements of the bench. (Note to self: always check the measurements after your piece has been cut. They might get offended but it is worth it to come home with the right size!!!) I took the MDF and foam outside and used some spray adhesive to mount the foam, centering the foam on top of the MDF. Always use spray adhesive in a well ventilated area. Outside is best!
Once the foam was secure to the MDF I brought it inside, laid out my batting, flipped the foam/MDF over so the MDF was on top and stapled it together. Once I had one side done I was able to tightly pull the other sides.
I saved the corners for last, folding them in to create a seamless top. I then trimmed the extra batting. This step gives a softer edge to your foam corners and makes adding the fabric even easier.
The next step was the trickiest. I decided to use matching fabric for the bench cushion instead of a solid gray fabric. I purchased one more tablecloth and now had to line up the pattern so that the bench back and cushion were symmetrical. This process would definitely have been easier with a non-geometric print but I’m happy with the results.
I lined the back of the bench up with the un-stapled bench cushion so that the patterns lined up. I then place one securing staple on the edge of the MDF just to hold it in position. That way once I flipped the cushion over I knew I was stapling it in the right place.
I then stapled the heck out of it, taking care to make neat even corners. The best method for this is to determine which edge is the front. Tuck the side flaps under the front and then fold the front over that, like wrapping a present. By doing this the front edge is totally straight with no corners or extra fabric visible.
I then took it one extra step. Let me explain myself on this one.
I have children.
Children are messy.
I may have scoffed in the past about people who cover their furniture with plastic.
I take it all back.
I had done all this work and I wanted it to last. I figured if the plastic wasn’t too obvious, why not? My bench cushion would stay cleaner and last longer. This would be a place where the two messiest people in my five-person household sit. I wanted them enjoy the space and until napkins became an everyday habit for them plastic was the way to go.
I found some at my local Hollinsworth 5 &10 which is a great local resource for DIY and craft items. The plastic was cut to fit my measurements. I brought it home to first test out. If it was glaringly obvious I probably would not have used plastic. The picture below shows the banquette back (no plastic) with the bench cushion wrapped in plastic on the bottom. I was afraid it would be too shiny or just look like a bit wad of plastic. I’m happy to say it doesn’t look like either. I was sold.
I used the same process to staple the plastic down as I did the fabric. I stapled one side, then pulled tightly as I stapled the other three. I carefully folded the corners last so that the visible edge was the neatest. Once everything was stapled down I trimmed off the excess plastic.
The finished cushion was then place on the bench, lined up and drilled in from underneath. I removed the drawers to do this. This way there was no slipping and I had a secure, sturdy piece of furniture. The cushion can easily be removed it necessary.
The whole process took me about 1 hour to complete. If I wasn’t trying to line up the pattern between the banquette back and the cushion it would have been much quicker. Try this process for any bench or chair you are looking to add a cushion too.
Share this:

Subscribe to Posts
Please enter a valid email address.
Thanks for subscribing!
Something went wrong. Please check your entries and try again.
A Little History
Blog Policies
For more information on all blog policies regarding comments, advertising, copyright, sponsored links, guest submissions, and other matters, please look here.


